Add a web page
- Click the “+” button to insert a new element.
- Select “Website”.
- Copy-paste the URL of the web page that you want to test.
- For data recording, activate eye-tracking and/or Thinking-Aloud.
Revisit last viewed URL
If a web page has already been added previously in the study, the last URL that a user visits can be called up again. The user can continue the study on the same website again. All of their keyboard entries are kept (forms, logins, shopping cart…). To do this, select “Use the last URL of the previous web element as the start URL”.

Number of screenshots
The number of screenshots determines the frequency with which screenshots are saved.
- Low: A new screenshot is taken each time the web page changes the URL.
- Medium (default): A new screenshot is taken every time the web page’s URL changes and every time JavaScript elements are triggered by a click (e.g. a click carousel).
- High: A new screenshot is taken with every web page change and JavaScript change.
Attention! The setting “High” can be used to record a high number of screenshots. However, the data may therefore be more difficult to evaluate, and the software may react slowly during data recording.
Please perform a test run with this setting before your study!
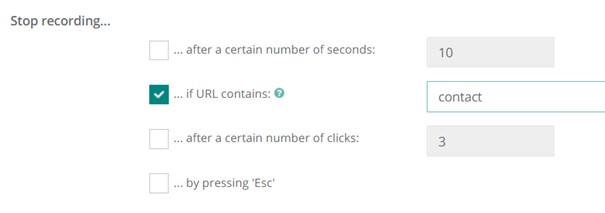
Stop recording
You can decide how to stop the recording. Multiple selection is possible:
- After a certain duration.
- After reaching the target URL. The recording stops automatically when the URL contains the specified text. This can either be the entire URL (for example, “test.com/contact/123”) or just part of the URL (e.g., “contact”).
- After a certain number of clicks.
- After pressing the “Esc” key.

